Peterbilt lift kit
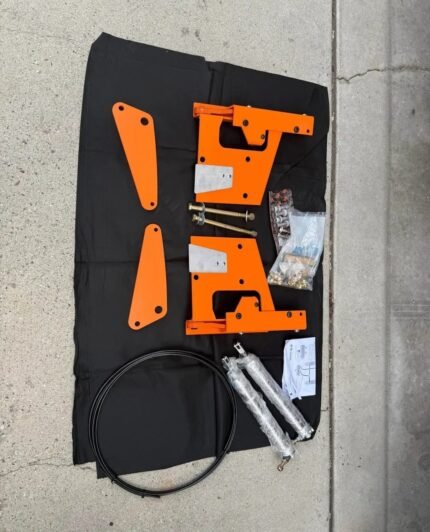
Installation Guide for Peterbilt Lift Kits If you’re looking to enhance the performance and appearance of your Peterbilt truck, installing a lift kit might just be the upgrade you need. This installation guide will walk you through the process of installing various types of lift kits on your Peterbilt, whether it’s for off-road adventures or boosting your truck’s capabilities. Before diving into the installation, let’s consider the benefits of a lift kit. Lift kits can provide increased ground clearance, allowing your Peterbilt to handle rough terrains with ease. It can improve the aesthetic appeal of your truck, giving it a more commanding presence on the road. Additionally, lift kits, such as the Peterbilt 379 bumper lift kit or the 389 Peterbilt fifth wheel lift kit, can enhance performance by accommodating larger tires and improving suspension. Gathering Your Tools and Parts To get started, you’ll need to gather the necessary tools and parts for your specific lift kit. Whether you’re installing a 2013 Peterbilt front steer axle lift kit or a Peterbilt 379 hood air lift kit, ensure you have the right components. Common tools required include wrenches, a jack, safety stands, and a torque wrench. It’s crucial to follow the manufacturer’s instructions for the specific lift kit you are installing. Step-by-Step Installation Process Step 1: Safety First Before you begin, park your truck on a flat surface and engage the parking brake. Use safety stands to support the vehicle after lifting it with a jack. Safety should always be your top priority during this installation. Step 2: Remove Existing Components Carefully remove any existing parts that will be replaced or modified by the lift kit. This could include the bumper or suspension components, depending on the type of kit you are installing. Step 3: Install the Lift Kit Follow the lift kit instructions to install the new components. This might involve attaching new brackets, springs, or other heavy-duty parts. Pay close attention to torque specifications to ensure everything is secured properly. Step 4: Adjust and Align Once the lift kit is installed, it’s essential to check the alignment of your truck. Adjust as necessary to ensure even weight distribution and proper handling. Misalignment can lead to uneven tire wear and compromised handling. Final Checks and Maintenance After installation, double-check all bolts and nuts to ensure they are tight and secure. It’s also recommended to take a short test drive to feel the new handling and make any necessary adjustments. Regular maintenance checks are vital to ensure the lift kit remains in good condition over time. Installing a lift kit on your Peterbilt can significantly enhance its performance and style. Whether you’re aiming for improved off-road capabilities or a more imposing road presence, following these steps will help you achieve the best results. Enjoy your newly lifted Peterbilt!